


-
Chamba
-
Cookware
-
Appliances
-
Cutlery
-
Kitchen Tools
-
Bakeware
-
Table/Bar
-
Food
-
Collections
- Sale
|
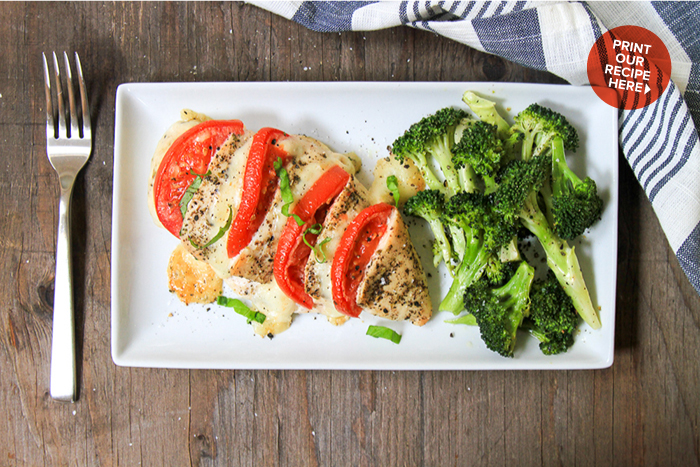
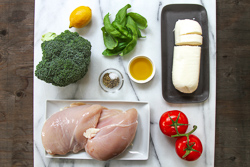
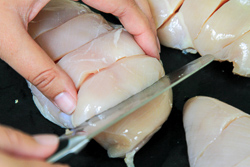
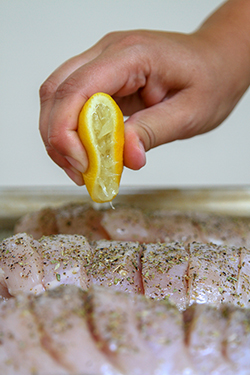
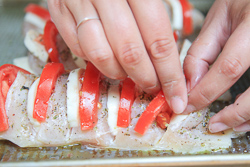
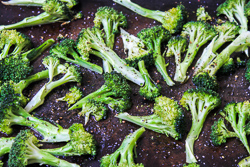
Serves 4 This recipe makes dinner a snap using our Secret Speedy Technique #1: The Sheet Pan. A sheet pan dinner utilizes oven roasting to create healthy dinner options quickly and easily. This caprese chicken is juicy and seasoned with fresh lemon juice, then stuffed with fresh mozzarella cheese and tomato slices. Since the broccoli and chicken had slighlty different roasting times, we used a separate sheet pan for the broccoli. Spread the broccoli out on the pan to ensure that it will roast properly and not simply steam. This recipe couldn't be easier to execute, and creates a tasty, colorful, and healthy dinner. Chicken Caprese Ingredients: Roasted Broccoli Ingredients: Garnish: Multi-Cooker Directions: |
|

|
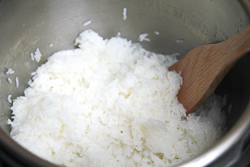
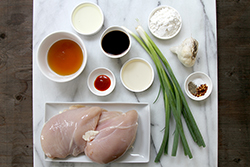
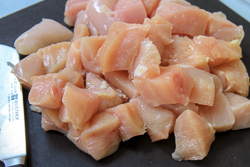
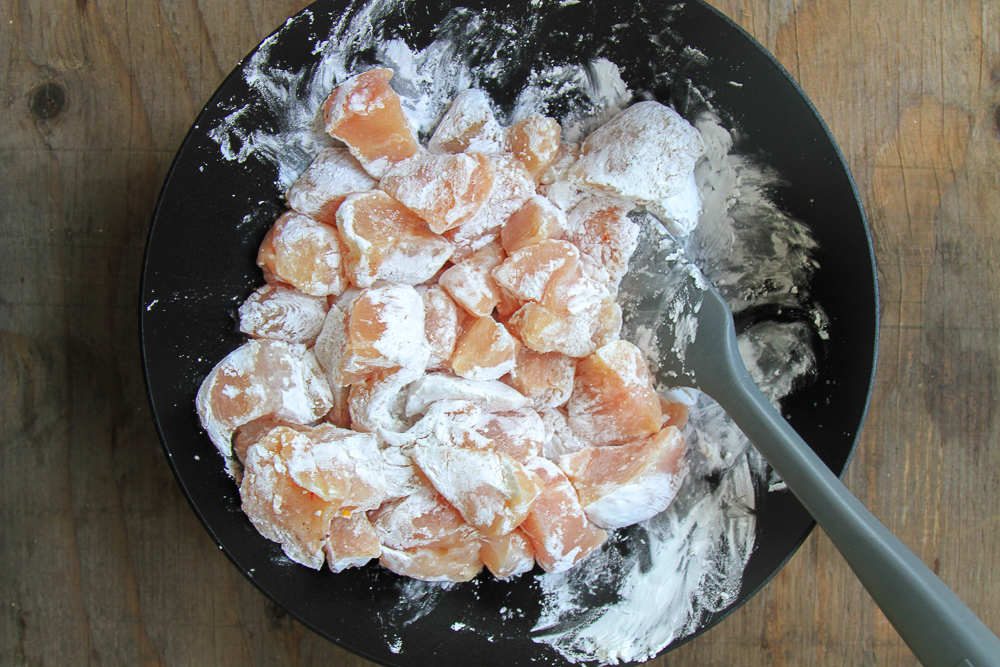
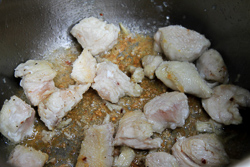
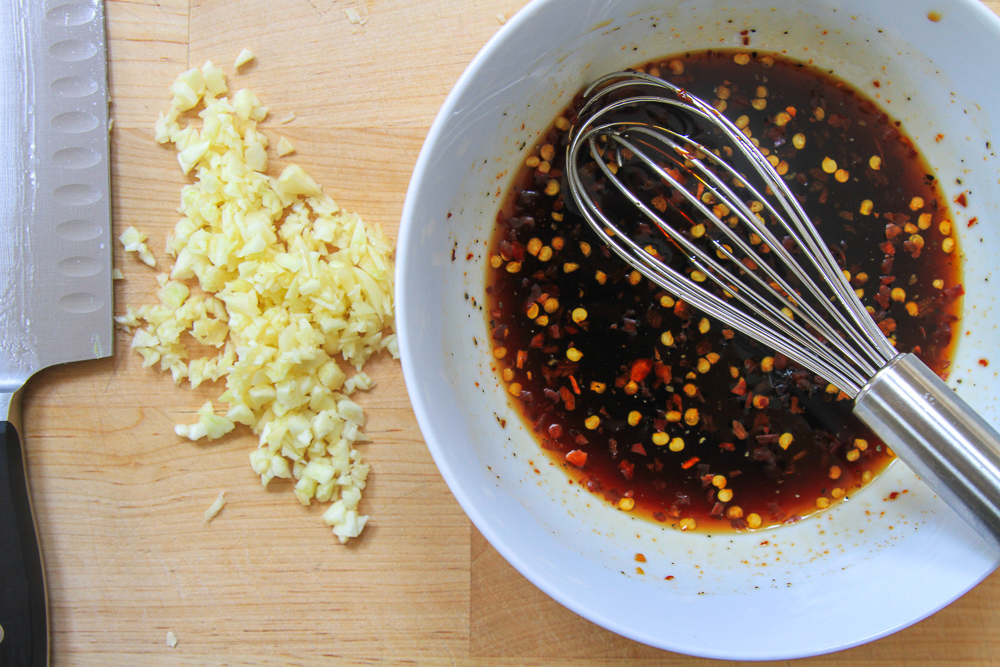
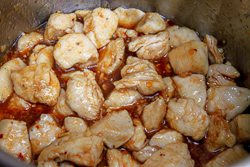
Serves 4 This recipe gets dinner on the table quickly using Secret Speedy Technique #2: The Multi-Cooker. A multi-cooker has several handy functions all in one - it can sauté, slow cook, pressure cook, cook rice, and more! We used three separate functions to get dinner done in a flash. First, we used the rice cooking function to make perfect, fluffy rice in about 10 minutes. Next, we used the sauté function to brown the chicken. Finally, we used the pressure cooking setting to infuse the sauce's flavors into the chicken. This dish is filled with deliciousness - sweet, salty, and a little spicy - it will satisfy any craving for take-out. Ingredients: Sauce: Garnish: Multi-Cooker Directions: 3. In a multi-cooker, using the sauté function, brown the chicken pieces on all sides in the canola oil, working in batches, as needed. 4. Once all the chicken has browned, transfer all the browned pieces to a plate and set aside. Add a 1/4 cup of water to the multi-cooker and scrape up any browned bits and wipe the bottom of the pot until clean and the water has evaporated. Or, you may leave the chicken and the browned bits in the pan, they will only enhance the sauce's flavors. 5. Meanwhile, mix the sauce ingredients together in a small bowl. Add the chicken back into the multi-cooker and drizzle with the sauce. Secure the lid, and follow the directions for your multi-cooker to cook at high pressure for 2 minutes. 6. Carefully, release the steam and serve over rice with a garnish of sliced green onions.
|
|

|
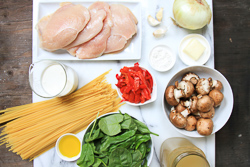
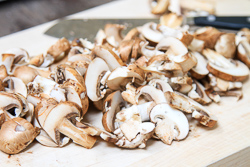
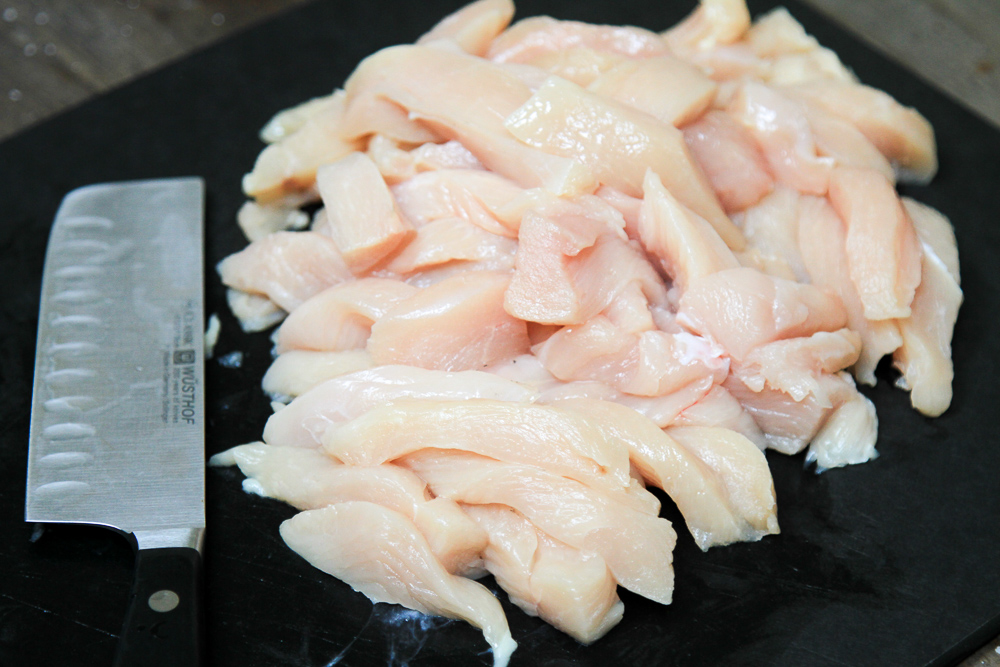
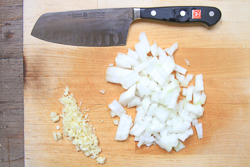
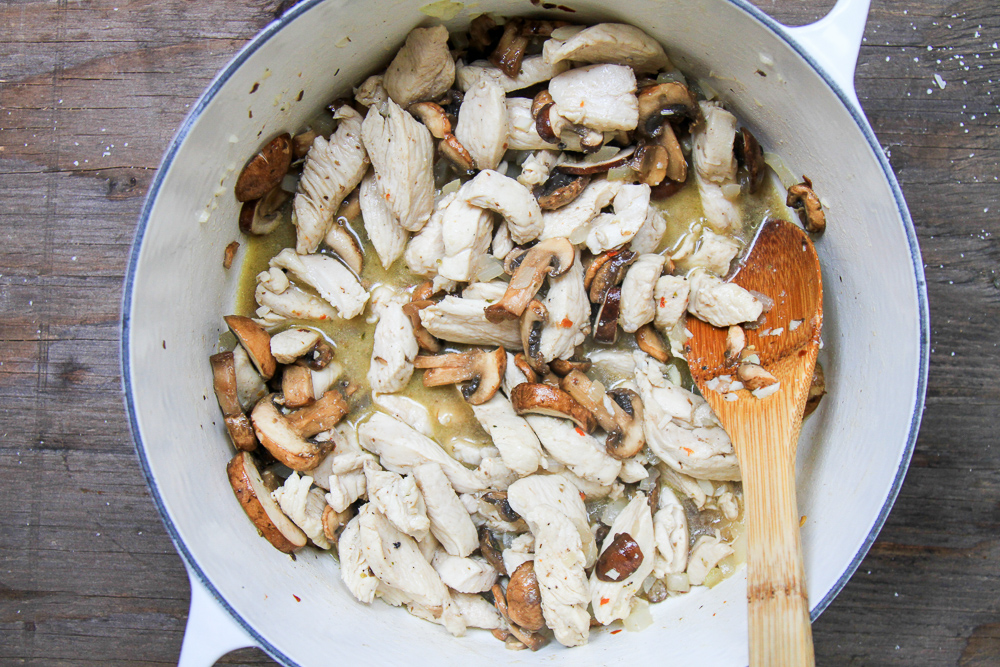
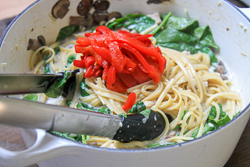
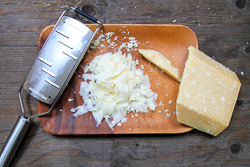
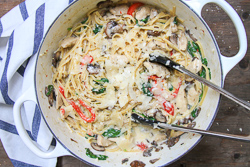
Serves 6-8 This recipe utilizes Secret Speedy Technique #3: The One Pot Pasta. A "one pot pasta," as you might expect, delivers a delicious pasta dinner with only using one pot --smart! This recipe boils the pasta in chicken, giving the whole dish an extra depth of savoriness. The bright pops of spinach and pepper nicely complement the earthy mushrooms and hearty chicken. Ingredients: Directions: 2. Make some space in the middle of the pot, and add the mushrooms and cook until they become tender. Sprinkle with the flour, and stir. 3. Add the chicken broth, and bring to a simmer. 4. Add the pasta, and simmer for about 9 minutes, stirring every few minutes to ensure that the pasta doesn't stick to the bottom of the pot. Cook until the pasta is al dente. 5. Turn heat to low and stir in the cream, fresh spinach, and roasted red pepper slices until all is combined and slightly thickened. Season to taste with Kosher salt and pepper. 6. Serve with a generous garnish of shaved parmesan cheese.
|
|
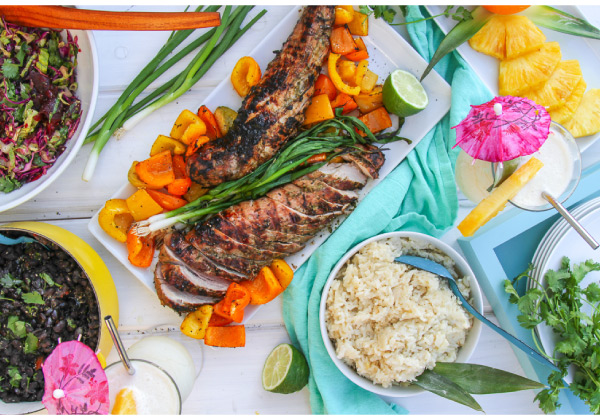
SUMMER'S END IS NEARLY HERE -- time to plan one last hurrah!
IN THIS ISSUE, we’ve planned a perfect dinner party menu with Jerk Pork Tenderloin, Coconut-Ginger Rice, Island Black Beans, Beet Slaw, and even a Classic Piña Colada! Break out the drink umbrellas, queue up a good playlist, and get ready for a party!


|
Cuisipro Fine V Rasp  This tool is a kitchen essential! Great for zesting citrus, cheeses, and more! |
|
Microplane 3-In-1 Ginger Tool  Include more ginger in your cooking! This 3-In-1 ginger tool makes it easy! |
|
Vitamix Asent Series  So many uses! Blend smoothies, sauces, marinades, soups, and more! |
|
All-Clad 3QT Stainless Steal Sauce Pan
 An essential pot that cooks rice, beans, and so much more. Stainless clad for the perfect balance between durability and efficient heat transfer.
|
|
Kyocera 3" Ceramic Paring Knife  A perfectly sized knife for small prep work. |
|
Clear Glass Drinking Straw  Serve drinks style with reusable glass straws. |


Serves 4
If you like piña coladas, then try our recipe! Punchy pineapple mixes with creamy coconut for a bright, refreshing, and very enjoyable cocktail experience!
Ingredients:
1 cup light rum
1 cup fresh pineapple juice
1 cup fresh cut pineapple
1/2 cup coconut cream
2-4 cups ice
Directions:
Using a high powered blender, blend together the rum, pineapple juice, pineapple, coconut cream, and ice. Blend, and make any adjustments, to taste. Serve immediately with a garnish of pineapple (and maybe an umbrella . . . .).
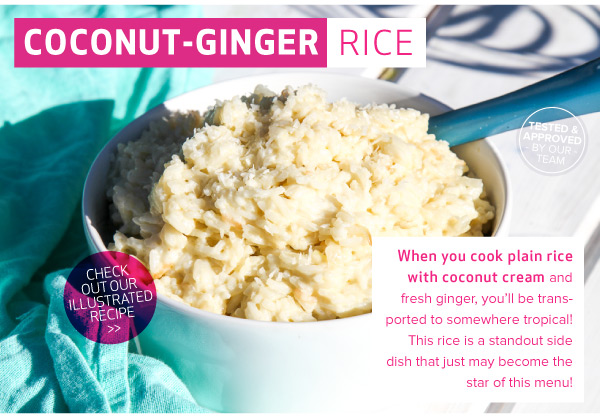
Serves 6
When you cook plain rice with coconut cream and fresh ginger, you’ll be transported to somewhere tropical! This rice is a standout side dish that just may become the star of this menu!
Ingredients:
2 cups jasmine rice
2 tablespoons olive oil
1 can coconut cream
1 tablespoon shallot, minced
1 teaspoon ginger, grated
1-1/2 cups chicken broth
1 teaspoon kosher salt
2 tablespoons shredded coconut
Directions:
1. Rinse the rice with cold water until the water runs clear.
2. Using a heavy-bottomed pot with a lid, sauté the ginger and shallot in olive oil until the shallot becomes translucent. Add the rice, and stir it until coated and every grain has a sheen.
3. Add the coconut cream, chicken broth, and salt, and bring to a boil. Stir occasionally to make sure that the rice doesn't stick to the bottom. Once boiling, turn the heat to low and cover with a tight-fitting lid. Simmer the rice on low for 15 minutes or until the rice grains become tender.
4. Remove from heat, and let sit for 5 minutes. Fluff with a fork before serving.
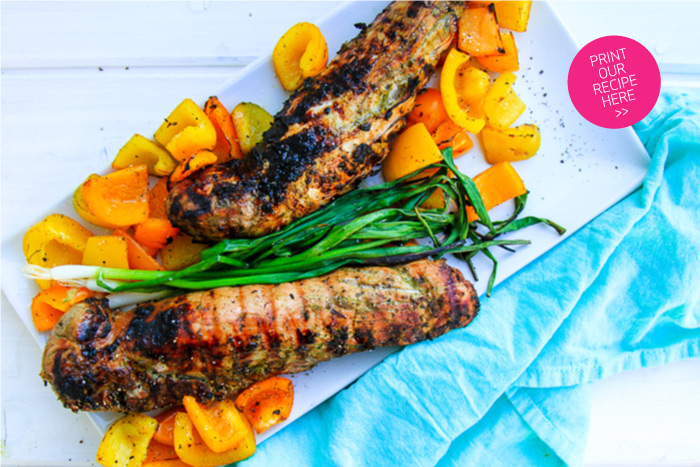
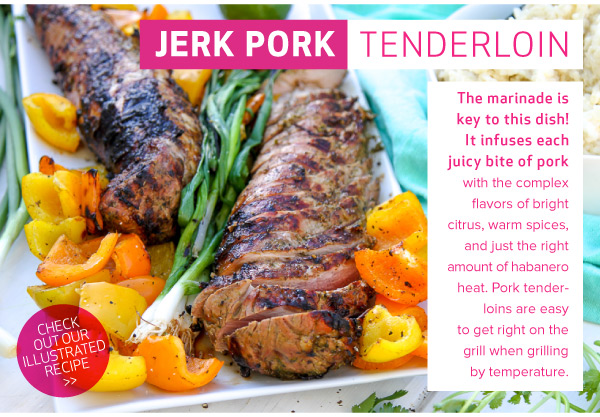
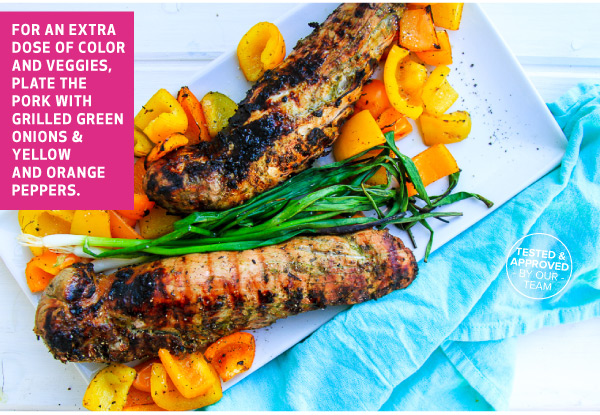
Serves 6-8
The marinade is key to this dish! It infuses each juicy bite of pork with the complex flavors of bright citrus, warm spices, and just the right amount of habanero heat. Pork tenderloins are easy to get right on the grill when grilling by temperature.
Ingredients:
2 (1-1/2 pound) pork tenderloins, trimmed
Marinade Ingredients:
2 cups coarsely chopped scallions
1/2 large white onion
1/2 cup cilantro, minced
1-inch fresh ginger, peeled and minced
2 garlic cloves, minced
1 habanero pepper, seeded and chopped
2 tablespoons white vinegar
2 tablespoon soy sauce
2 tablespoon olive oil
Juice of 1 orange, fresh squeezed
Zest and juice of 1 lime
2 tablespoons brown sugar
2 teaspoons kosher salt
1 teaspoon dried thyme
1/2 teaspoon black pepper
1/2 teaspoon ground allspice
1/4 teaspoon ground nutmeg
1/4 teaspoon ground cloves
1/8 teaspoon ground cinnamon
Directions:
1. Blend all of the marinade ingredients together using a high-powered blender. Add the marinade to a large plastic bag, and add the two tenderloins. Remove any air, and seal the bag. Marinate for 4-24 hours in the refrigerator.
2. Fire up the grill! Set up an direct/indirect grill. Place the tenderloins on the direct heat. Let sear for 5 minutes, then flip to the other side for another 5 to 7 minutes. If the pork begins to get overly seared, move to the indirect side of the grill. Cook until the internal temperature reaches 145 degrees F.
3. Remove the tenderloins from the grill, and cover with a piece of foil and allow the meat to rest for 10 minutes.
4. Slice and serve while warm.
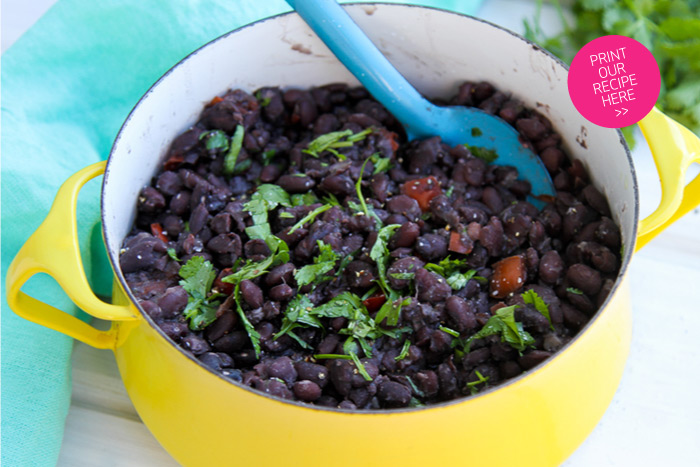
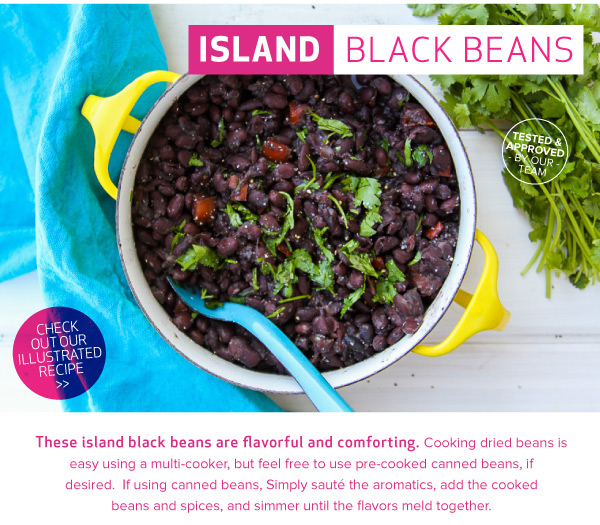
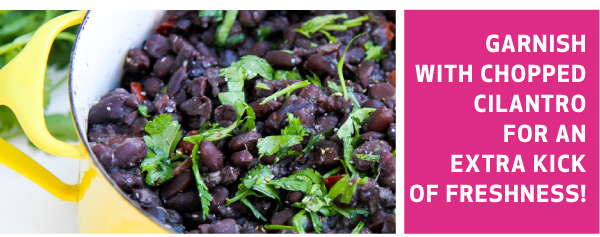
Serves 6-8
These island black beans are flavorful and comforting. Cooking dried beans is easy using a multi-cooker, but feel free to use pre-cooked canned beans, if desired. If using canned beans, Simply sauté the aromatics, add the cooked beans and spices, and simmer until the flavors meld together.
Ingredients:
3 tablespoons olive oil
1 medium onion, diced
1 red pepper, diced
8 cloves garlic, minced
1/4 cup dry white wine
1 lb dried black beans, rinsed and any small stones removed
2 bay leaves
1/2 teaspoon dried oregano
1/4 teaspoon cumin
1 teaspoon Kosher salt
1/4 teaspoon pepper
1 tablespoon brown sugar
6 cups water
Multi-Cooker Directions:
1. In a multi-cooker that can both sauté and pressure cook, sauté the onion, pepper, and garlic in olive oil until the onion is translucent. Add the white wine, and simmer until it fully reduces.
2. Add the dried black beans, two bay leaves, oregano, cumin, Kosher salt, pepper, and brown sugar. Top off the mixture with 6 cups of water, and then follow your pressure cooker instructions.
3. Bring to pressure, and then cook for 25 minutes. Once the pressure has fully released, carefully remove the lid according to your cooker instructions. Discard the bay leaves.
4. Taste the beans and add any additional seasoning, as needed.
Pre-Cooked Beans (canned) Directions:
1. Sauté the onion, pepper, and garlic in the olive oil until the onion is translucent. Add the white wine, and simmer until it fully reduces. Add the bay leaves, oregano, cumin, salt, pepper, and brown sugar.
2. Add the canned beans to the pot along with 1/2 cup of water. Simmer on low for 15-20 minutes to allow the flavors to combine with the beans. Discard the bay leaves and serve.
Traditional Cooking of Dried Beans Directions:
1. Soak the dried beans in water overnight. In a large saucepan, simmer the soaked beans in 6 cups of water for 1 hour, or until tender. Drain away an excess water by placing the beans in a colander.
2. Meanwhile sauté the onion, pepper, and garlic in olive oil until the onion is translucent. Add the white wine, and simmer until it fully reduces. Add the bay leaves, oregano, cumin, salt, pepper, and brown sugar.
3. Add the cooked beans back into the pot along with 1/2 cup of water. Simmer on low for 15-20 minutes to allow the flavors to combine with the beans. Discard the bay leaves and serve.
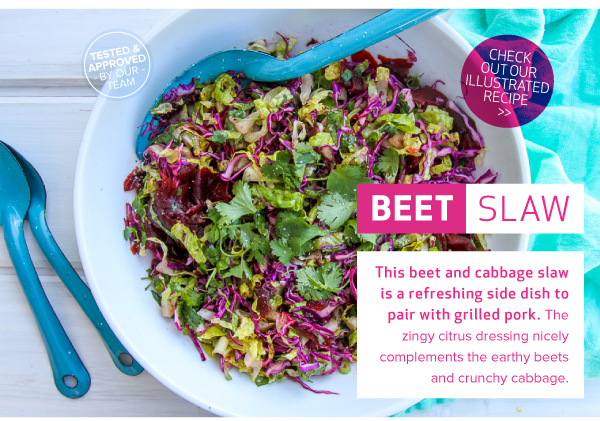
Serves 6-8
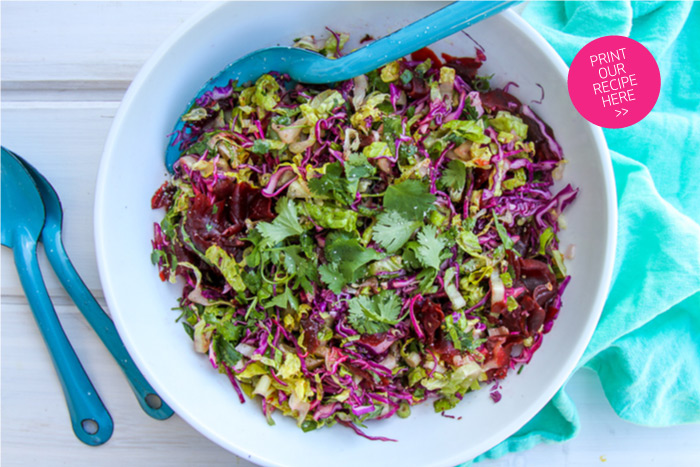
This beet and cabbage slaw is a refreshing side dish to pair with grilled pork. The zingy citrus dressing nicely complements the earthy beets and crunchy cabbage.
Ingredients:
4 small steamed and peeled beets, thinly sliced
1 head romaine lettuce, finely sliced
1/2 small red cabbage, finely sliced
1/4 cup cilantro, minced
3 scallions, sliced
Dressing:
3 tablespoons olive oil
2 tablespoons apple cider vinegar
Juice of 1/2 orange
Juice of 1 lime
1 teaspoon brown sugar
1/4 teaspoon cumin
1/4 teaspoon Kosher salt
1/4 teaspoon freshly ground black pepper
Directions:
1. Whisk together the dressing ingredients in a small bowl.
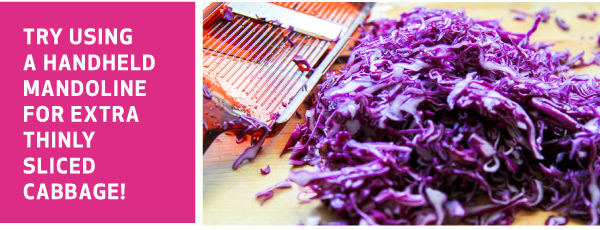
2. Slice the beets and cabbage into very thin slices using a handheld mandoline or sharp knife and cutting board. Chop the lettuce and scallions and mince the cilantro. Toss the prepped vegetables together in a large bowl.
3. Drizzle the dressing over the vegetables at least 20 minutes prior to serving, (but no longer than 2 hours prior) to allow the flavors to fuse together. Keep refrigerated before serving.
Join us for End of The Year Sale this Labor Day weekend!
Friday, August 31st, 9 a.m. - 5 p.m.
Saturday, Sunday, Monday, September 1-3, 10 a.m- 5 p.m


|
USA Pan Nonstick Baking Pans
|
|
Ateco 12 piece Large Tube Set These large, stainless steel pastry tips are made in the USA. |
|
Gel Colors from Americolor
Gel food coloring stays consistent, and won't alter the texture of frostings! |
|
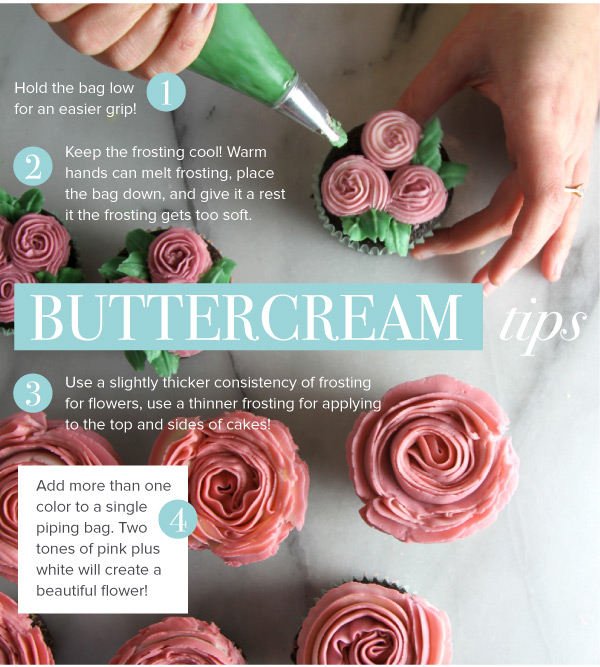
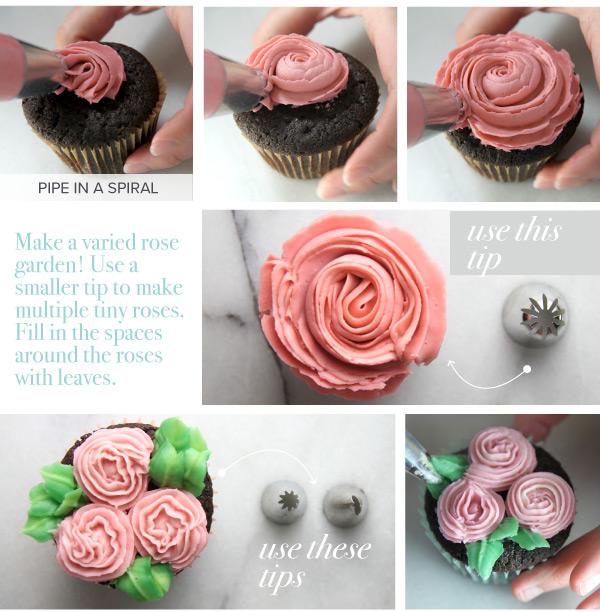
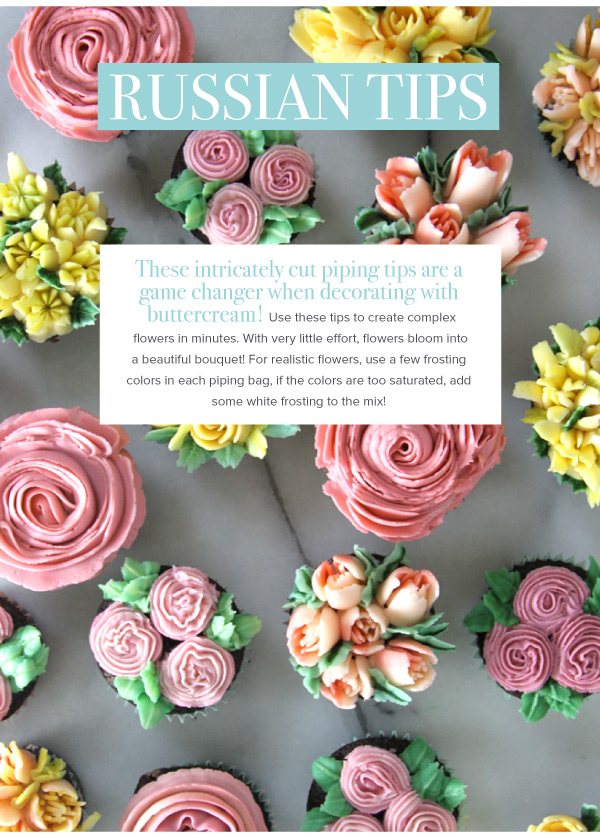
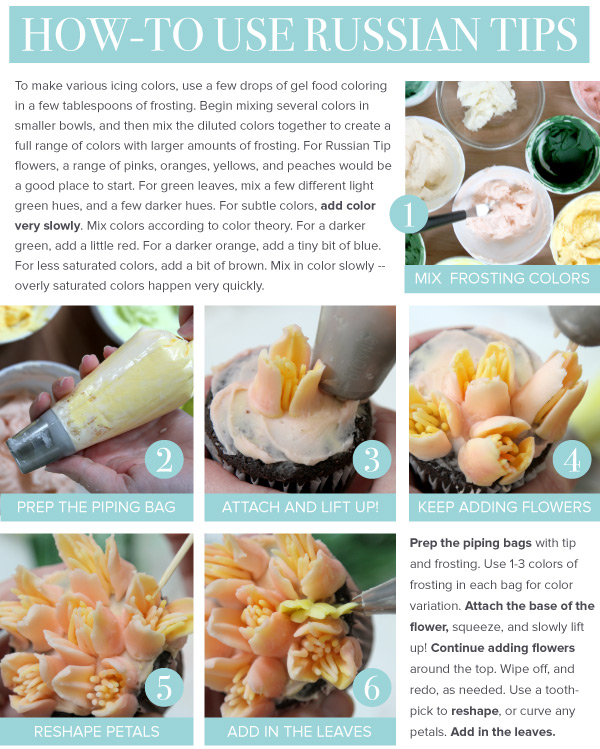
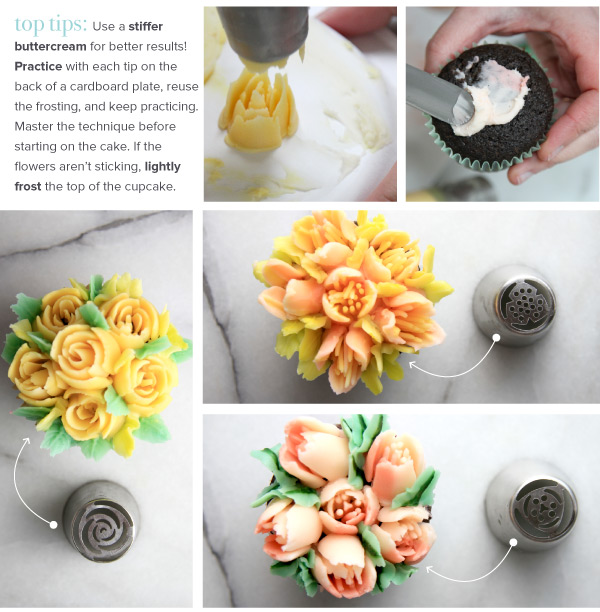
Ateco Russian Decorating Tips
Make beautiful frosting flowers fast and easy!
|
|
Ankarsrum Stand Mixer
A great stand mixer is the key for baking amazing cakes and frostings! |
|
Cooling Racks Extra Cooling Racks come in handy when baking! |


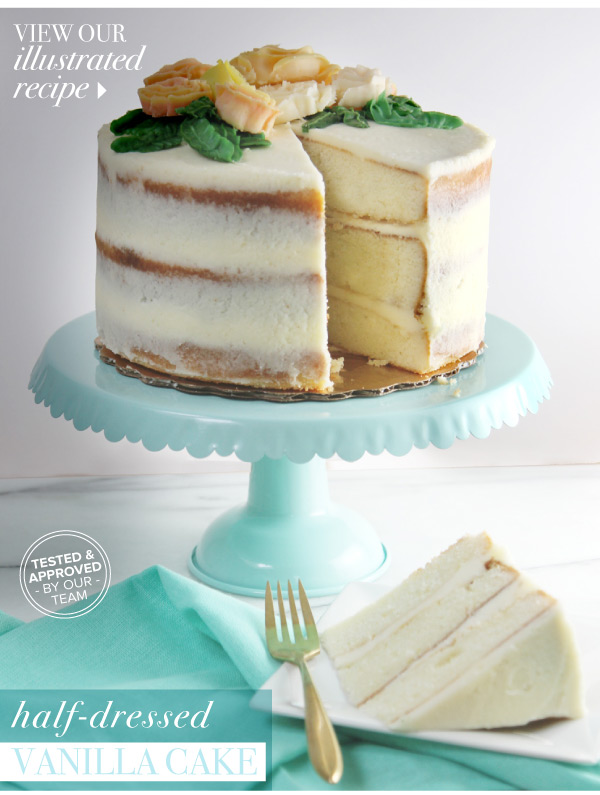


Makes (3) 8-inch Layer Cakes
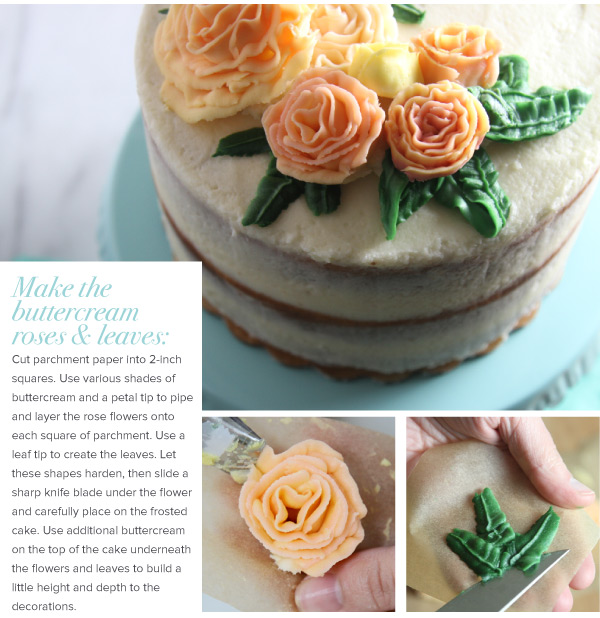
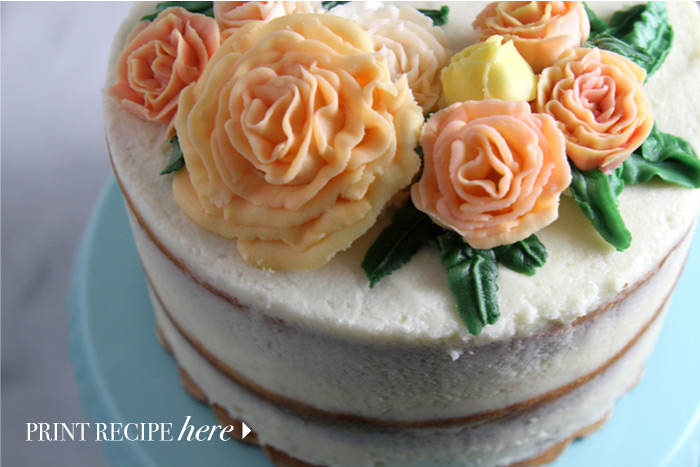
Spring into party mode! A beautifully layered cake is easier to make than you might think. Just use quality baking pans, only the best ingredients, and apply a little patience. This half-dressed cake is sparingly frosted on the outside, with rich, creamy, buttercream applied between each layer of a very vanilla-y cake. We feature a wreath of buttercream flowers and leaves on top, but fresh berries, or edible flowers would also be a stunning presentation.
Cake Ingredients:
3 cups cake flour
1/4 teaspoon baking soda
2-3/4 teaspoons baking powder
1/2 teaspoon salt
1 cup whole milk,room temperature
1/2 cup buttermilk, room temperature
1-1/2 cups unsalted butter (3 sticks), room temperature
2-1/4 cups sugar
4 eggs, room temperature
2 teaspoons vanilla bean paste
1/2 teaspoon almond extract
Vanilla Simple Syrup:
(heat the ingredients in a small saucepan and stir until the sugar is dissolved. Let cool, then use to lock in moisture in the baked cakes)
1/4 cup water
1/4 cup sugar
1/4 tsp pure vanilla extract
Frosting:
Vanilla Buttercream (use our recipe)
Buttercream Flowers and Leaves
Directions:
1. Preheat the oven to 350 degrees F. Place the baking racks one-third from the bottom and two-thirds from the top of the oven. Prepare three 8-inch cake pans with parchment rounds, and spray the insides well with baking spray.
2. Using a whisk, mix the dry ingredients (flour, baking soda, baking powder, and salt) together in a large bowl until evenly combined with no lumps appearing. Set aside.
3. In a separate bowl, whisk together the milk and buttermilk until evenly combined. Set aside.
4. In a large stand mixer, cream the butter and sugar together for 3-5 minutes until smooth and creamy.
5. Add the eggs, vanilla, and almond extract to the creamed butter and mix until fully incorporated.
6. Alternate adding the remaining dry and wet (milk and buttermilk) ingredients, beginning and ending with the flour mixture. Beat until just blended. Do not over mix, but do make sure that the batter is smooth, and not lumpy. Pour the batter equally into the three prepared pans.
7. Bake for 30-35 minutes, or until the center of the cake springs back from a light fingertip touch, and a toothpick inserted in the center returns clean.
8. Cool the cakes on top of a cooling rack for 10-20 min, then run a dull blade around the edge of the pan to loosen the sides. Invert the cake using a plate, and place the cake onto a cooling rack. Allow the cake to continue completely cooling before layering and frosting.
9. Place a cardboard cake circle on a revolving cake stand using a little smear of frosting to secure it. Dab another smear of buttercream on the top of the secured cardboard round, and place the first layer of cake in the center. Trim the layer horizontally with a long serrated bread knife to obtain a flat top. Brush the cake with a thin coat of vanilla simple syrup.
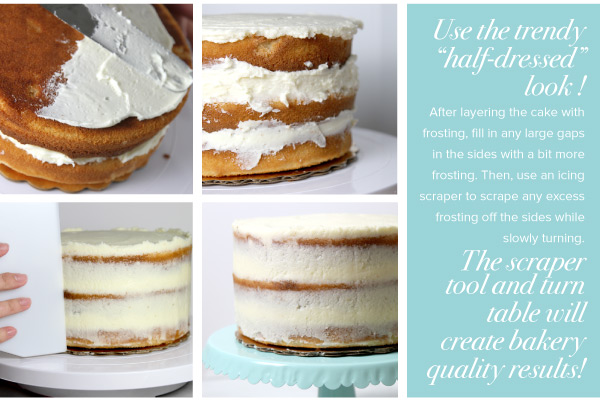
10. Once the simple syrup has dried, about 15 minutes, evenly frost the top of the layer with a 1/4" thick layer of buttercream. Finish building the cake by adding layers alternating with cake and frosting. Use the bottom side of a cake as the final layer, as it will have the strongest edge.
11. Add the buttercream frosting to the sides of the cake, frost lightly, while turning the cake. Scrape any excess frosting off the sides with a icing scraper for a "half-dressed" look.
12. Add buttercream icing to the top of the cake spreading it in a thick, even layer. Finish the frosting process by cleaning up the top edge of the cake with an offset spatula.
13. Add any other decorations to the cake, as desired.
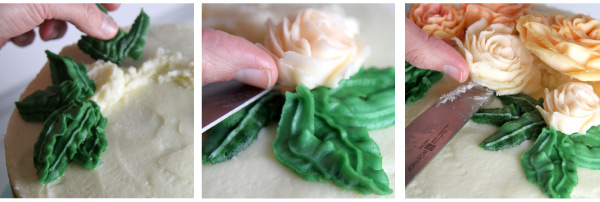
14. To make buttercream roses and leaves, as shown on the top of our cake, cut pieces of parchment paper into 2 inch squares. Use various shades of buttercream and a petal tip to pipe and layer the rose flowers onto each square of parchment. Use a leaf tip to create the leaves. Let these shapes harden or crust slightly -- about 30 minutes or longer. (A short stint in the freezer may help to stabilize the shapes.)
15. When ready, remove each flower from the parchment piece by sliding a sharp knife under each flower and transferring them carefully to the frosted cake. Use additional buttercream on the top of the cake underneath the flowers and leaves to build a little height and depth to the decorations.


 Quality baking


