-
Chamba
-
Cookware
-
Appliances
-
Cutlery
-
Kitchen Tools
-
Bakeware
-
Table/Bar
-
Food
-
Collections
- Sale
March 22, 2018
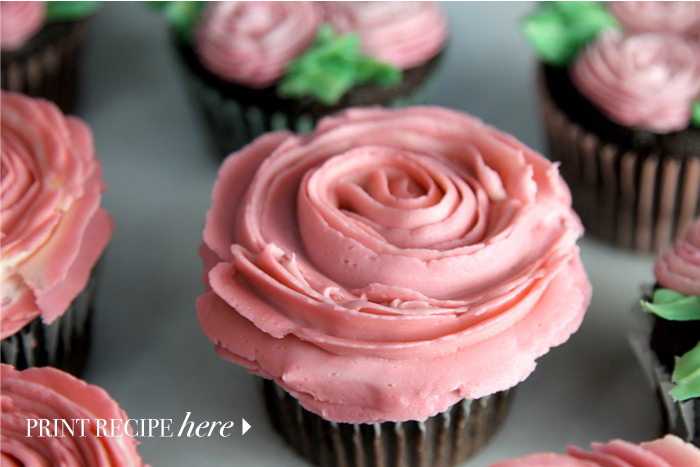
Makes 24
A delicious cupcake beautifully decorated is a delight! These mocha chocolate cupcakes with festive buttercream roses are almost too cute to eat -- almost! The secret ingredient, sour cream, keeps these cakes extra moist. (Another baker's trick for locking in moisture is to paint the baked cupcakes with simple syrup before decorating.)
Ingredients:
2 cups all-purpose flour
3/4 cup unsweetened cocoa powder
2-1/2 teaspoons baking soda
1/2 teaspoon salt
12 tablespoons (1-1/2 sticks) butter
2 cups sugar
2 large eggs
1 teaspoon pure vanilla extract
1/2 cup sour cream
3/4 cup strong, black coffee
Vanilla Simple Syrup: (Heat the ingredients in a small saucepan and stir until the sugar is dissolved. Let cool, then use to lock in moisture in the baked cupcakes)
1/4 cup water
1/4 cup sugar
1/4 tsp pure vanilla extract
Frosting:
Vanilla Buttercream (use our recipe, double the recipe, as needed, depending on how much frosting is used on each cupcake, and how many colors are mixed)
Directions:
1. Preheat the oven to 350 degrees F. Lightly grease the top of the cupcake pan with a bit of vegetable oil, then place cupcake liners in two 12 count cupcake pans (for 24 cupcakes).
2. Using a whisk, combine the dry ingredients (flour, cocoa powder, baking soda, and salt) together in a large bowl mixing until evenly combined with no lumps visible. Set aside.
3. Combine the wet ingredients (vanilla, sour cream, and coffee) in a separate bowl or larger glass measuring cup. Set aside.
4. In a large stand mixer, cream the butter and sugar together for 3-5 minutes until smooth and creamy.
5. Add the eggs one by one to the creamed butter, mixing after each addition until fully incorporated.
6. Alternate adding the remaining wet and dry ingredients, beginning and ending with the flour mixture and beating until just blended. Do not over mix, but make sure that the batter is smooth, and not lumpy.
7. Transfer the batter to the prepared cupcake pans by using a cookie scoop, large spoon, or a large piping bag.
6. Bake for 19-22 minutes, or until cake springs back from a light touch, or when a toothpick inserted in the center returns cleanly.
7. Remove the cupcakes from the baking pan, and place on a cooling rack to cool completely..
8. Brush the tops of the baked cupcakes with the simple syrup to lock in moisture before frosting. Let the tops dry completely before frosting - at least 15 minutes.
9. Frost the cooled cupcakes creatively!
10. For large frosting roses, fill a frosting bag with two pink frostings, and a little bit of white frosting for a variegated color. Use a drop flower style tip, and begin the rose from the inside, then spiral out.
11. For smaller roses, use two tones of purple frosting. Use an open star style tip to create the roses, and a leaf tip for the leaves.
March 22, 2018
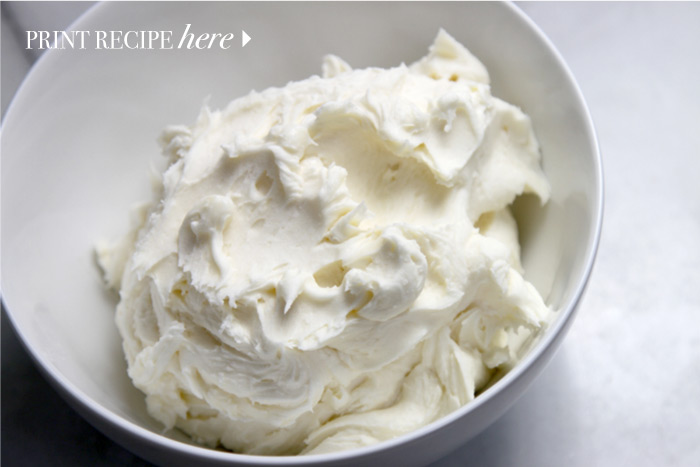
Makes about 4 cups
A simple vanilla buttercream icing is easy to whip up with a stand mixer, and this one tastes so delicious! The nature and consistency of this recipe works well for frosting any cake simply, as well as when making elaborate buttercream flowers. Get creative by mixing various colors or using fancy frosting tips. We dare you to just try not licking your fingers!
Ingredients:
1 lb (4 sticks) unsalted butter, room temperature
7 cups powdered sugar
2-3 tablespoons heavy cream
2 teaspoons vanilla extract
Optional:
Gel food coloring in various colors
Directions:
1. Using a stand mixer, beat the butter for 5 minutes until it turns a pale yellow and has a smooth, silky consistency. Add the vanilla and beat for an additional 30 seconds until well combined.
2. Sift the powdered sugar once to remove any lumps. Add half of the powdered sugar to the creamed butter, and whip for 3-5 minutes until the icing looks nicely whipped. Then add the remaining half of the sugar, and whip for an additional 3-5 minutes, until fully incorporated with a whipped consistency.
3. Add the cream 1 tablespoon at a time, beating until the desired texture is reached. Make a thicker buttercream texture for any complex frosting shapes, and a thinner texture for frosting cakes. Make sure to scrape down the sides of the bowl occasionally with a spatula to ensure all the ingredients are evenly mixed.
4. Mix different colors of buttercream icing using gel food coloring. (Gel food coloring tends to keep the consistency of the icing versus liquid food coloring. As well, gel food coloring lends deep colors with just a little bit. Assemble the various colors desired using small amounts of the gel coloring in a few tablespoons of white icing -- this is your "base starter color." Mix various tints of the desired colors by using several smalll bowls. Transfer most of the base color to another bowl reserving only the amount of the base color needed for final decorating. Add white buttercream to the second bowl in a quantity needed to achieve the next lighter color. Transfer most of this second color to a third bowl reserving the amount needed of the second lighter color needed for final decorating. In the third bowl, add enough white buttercream to achieve the next lighter tint. Continue for the number of colors desired. Create a full range of colors with larger amounts of frosting. For buttercream flowers, a range of pinks, oranges, yellows, and peaches would be a good place to start. For green leaves, mix a few different light green hues, and a few darker hues. For subtle colors, add color very slowly. Mix colors according to color theory, i.e., for a darker green, add a little red. For a darker orange, add a tiny bit of blue. For less saturated colors, add a bit of brown. Mix color in slowly -- over-saturated colors happen very quickly.
5. After mixing an array of colors, keep the frosting covered with plastic wrap until you're ready to use.
March 08, 2018
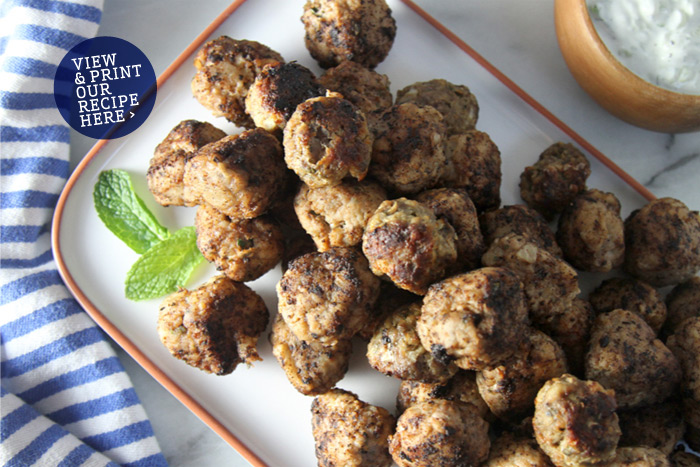
Makes about 1.5 cups
Ingredients:
1 English cucumber, coarsely grated
1 cup whole milk plain Greek yogurt
1 tablespoon fresh dill, minced
1 clove garlic, grated or crushed
1 lemon, juiced
Kosher salt and pepper, to taste
Directions:
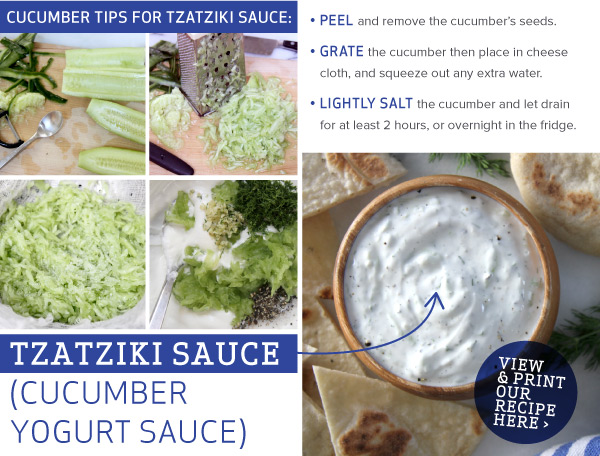
1. Prepare the cucumber by peeling, removing the seeds, and grating with a coarse grater. Place the grated cucumber in cheese cloth, and squeeze out any extra water. Lightly salt the cucumber and let drain for at least 2 hours, or overnight in the refrigerator.
2. Mince the dill, grate or crush the garlic, and juice the lemon.
3. Mix all the ingredients together. Salt and pepper, to taste.
March 08, 2018


|
Take the guesswork out of cooking meatballs-simply make sure they reach the right temperature-neither underdone or overdone. |
|
Durable glass prep bowls are essential when prepping any recipe-especially a big Greek-inspired dinner! |
|
Make rolling out pitas (and all kinds of dough) simple! |
|
Emile Henry Rectangular Baking Dish A necessary dish for so many recipes! Perfect for "bringing a dish" to share. |
|
Norpro Stainless Bench Scraper A helpful tool when working with bread dough and for cleaning up flour-y work surfaces. |
|
Cast iron sears meatballs and all meats beautifully! Also works well for making pita bread.
|

March 08, 2018
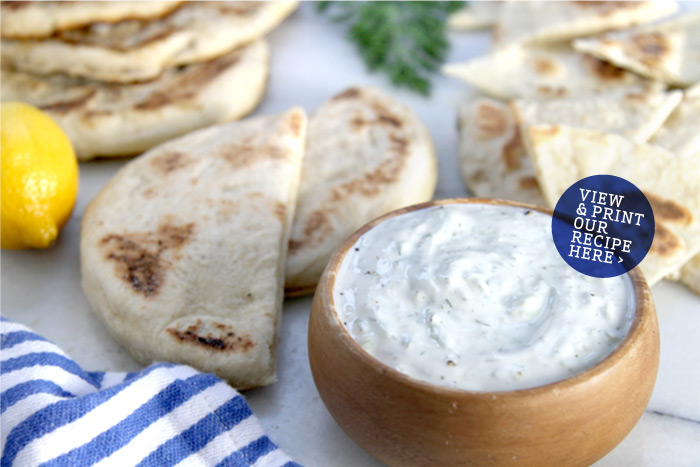 Makes 8
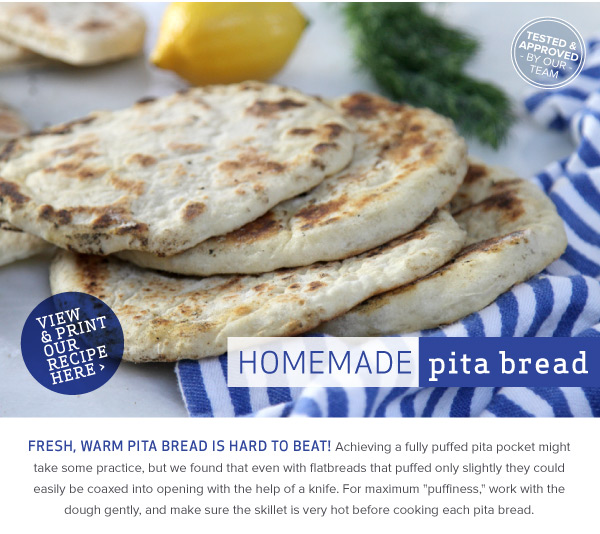
Fresh, warm pita bread is hard to beat! Achieving a fully puffed pita pocket might take some practice, but we found that even with flatbreads that puffed only slightly could easily be coaxed open into pockets with a knife. For maximum "puffiness," work with the dough gently, and make sure the skillet is very hot before cooking each pita bread.
Ingredients:
1 cup warm water
1 packet active yeast, or 2-1/4 teaspoons
2-1/2 to 3 cups flour
1 teaspoon Kosher salt
1/2 teaspoon sugar
2 tablespoons olive oil, plus extra for oiling bowl
Directions:
1. In the bowl of a stand mixer, pour in the warm water and sprinkle the yeast on top. Allow the yeast to hydrate and bloom by leaving undisturbed for 2-3 minutes.
2. Add one cup of flour and the sugar to the yeast and water. Mix on low speed with the paddle attachment for about 1 minute or until evenly combined. Let the beginning batter stand for about 20 minutes for further yeast development.
3. After this rest, many bubbles will have formed. Add the salt and olive oil to the batter. On low speed, slowly add an additional 1-1/2 cups of the flour.
4. Continue to mix and add 2-4 tablespoons of additional flour until a soft dough ball has formed. The dough should be "springy," and not too sticky.
5. Remove the dough from the mixer and knead on a lightly floured surface until the dough forms a nice, well-rounded ball.
6. Clean the mixing bowl, then drizzle a little olive oil and coat the inside of the bowl. Place the dough into the bowl, turn it to coat all surfaces with the olive oil. Cover, and let rise for 2 hours or until doubled in size.
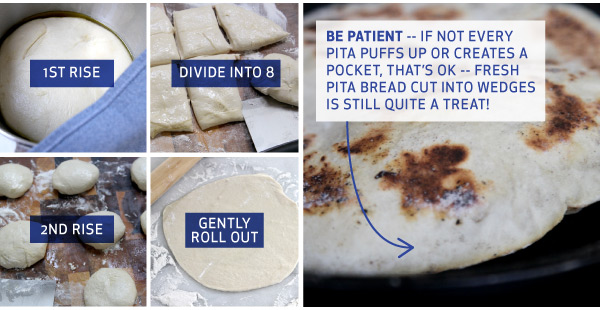
7. Remove the risen dough from the bowl, and pat into a flat disk. Divide the disk into 8 equal sections with a dough cutter or large chef's knife.
8. Form each section into it’s own small ball by folding the dough under the bottom until a neat ball has been formed.
9. Place the 8 individual balls on a lightly floured surface and cover with plastic wrap for 30 minutes and let rise again.
10. Once the individual dough balls have risen, remove a single ball and gently roll into a 8” circle, or until the dough is about 1/4” thick.
11. Preheat a well-oiled cast-iron pan on the stovetop over medium-high heat.
12. Place the rolled out dough pieces in the heated pan, and watch it puff up. Turn until each side is slightly golden, about 3 minutes per side.
13. Serve as a pita pocket by cutting in half, using a knife to coax open the pita if necessary. Or, cut the pita into 6 wedges. Be patient -- if not every pita puffs up or creates a pocket, that’s ok -- fresh pita bread cut into wedges is still quite a treat!
March 08, 2018
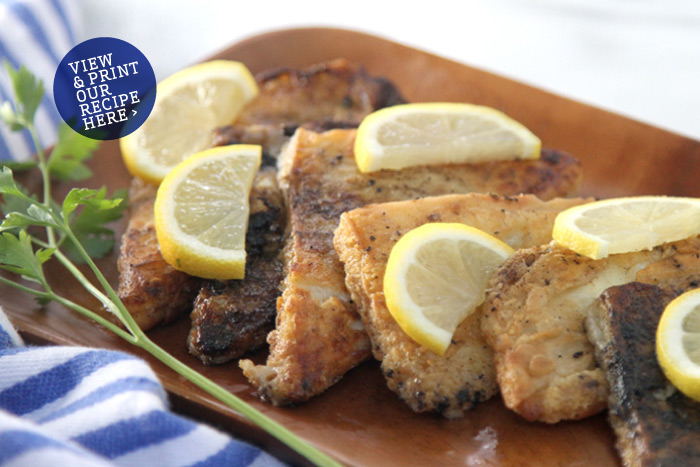
Serves 4
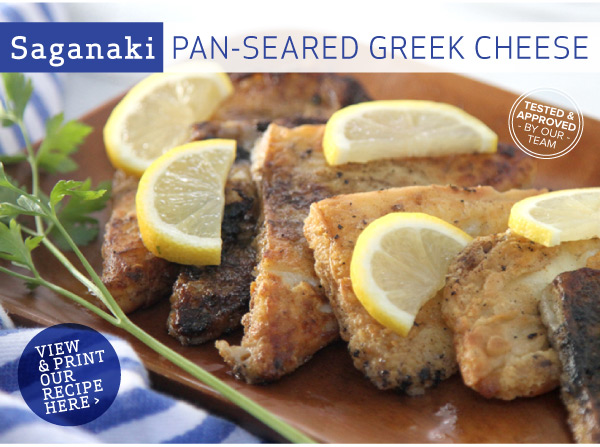
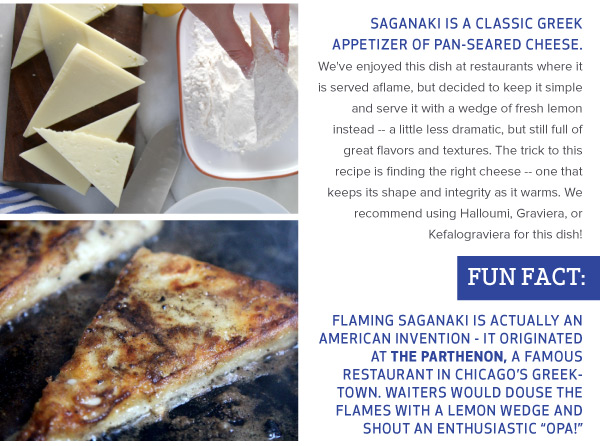
Saganaki is a classic Greek appetizer of pan-seared cheese. We've enjoyed this dish at restaurants where it is served aflame, but decided to keep it simple and serve it with a wedge of fresh lemon instead; a little less dramatic, but still full of great flavors and textures. The trick to this recipe is finding the right cheese -- one that keeps it's shape and integrity as it warms. We recommend using Halloumi, Graviera, or Kefalograviera for this dish!
Ingredients:
1/4 cup water
1/2 cup flour
8 oz Greek grilling cheese: (Halloumi, Graviera, or Kefalograviera)
1 tablespoon olive oil
1 small lemon, cut into wedges
Directions:
1. Cut the cheese into 1/4” slices, then into triangles, if you like.
2. Add water to a bowl. Put the flour in a separate bowl.
3. Dip the cheese first in the water, then lightly coat with a dredging in flour.
4. Pan fry in a skillet with olive oil that is hot, but not yet smoking. Cook until browned, bubbly, and slighlty melted on each side.
5. Serve immediately with a wedge of fresh lemon.
March 08, 2018
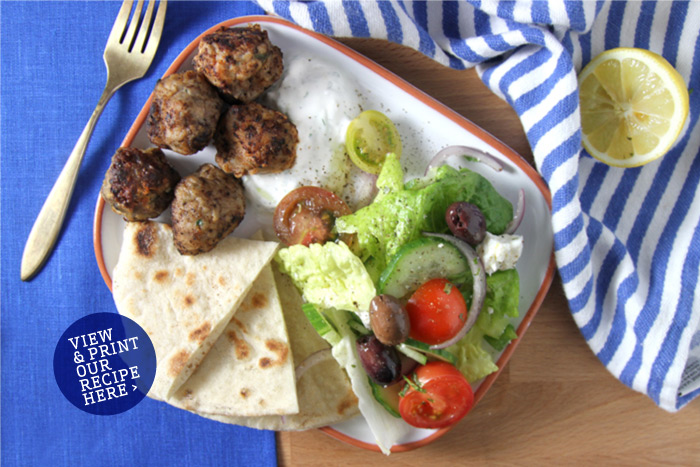
Serves 4 - 6
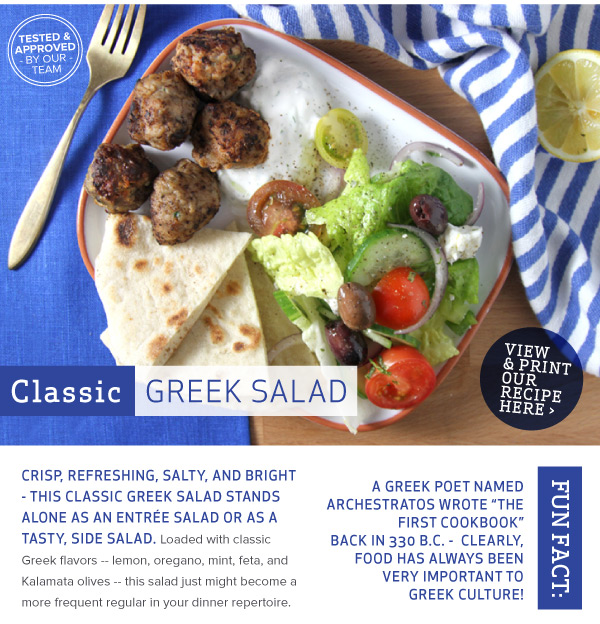
Crisp, refreshing, salty, and bright - this classic Greek salad stands alone as an entrée salad or as a tasty, side salad. Loaded with classic Greek flavors -- lemon, oregano, mint, feta, and kalamata olives -- this salad just might become a more frequent regular in your dinner repertoire.
Ingredients:
1 head romaine lettuce, roughly chopped, or torn
1/2 green pepper, diced
1/3 red onion, thinly sliced
1/4 cup kalamata olives, pitted, halved
1/2 English cucumber, sliced
1/2 cup grape tomatoes, halved
2” chunk of feta, crumbled
Dressing Ingredients:
1 lemon, juiced
3 tablespoons olive oil
1 tablespoon red wine vinegar
1/2 teaspoon dried oregano leaves
1 teaspoon fresh mint, minced
1/2 teaspoon Kosher salt
1/2 teaspoon freshly ground black pepper
1 clove garlic, minced
Directions:
1. Whisk all the dressing ingredients together.
2. Wash all of the salad ingredients thoroughly. Spin the lettuce dry and combine with all the other prepped vegetables. Salt and pepper the assembled salad before dressing.
3. Re-chill the assembled salad before dressing and serving.
4. When ready to eat, toss with the dressing. Top with the crumbled feta cheese. Serve from a common bowl, or on individual salad plates.
February 15, 2018
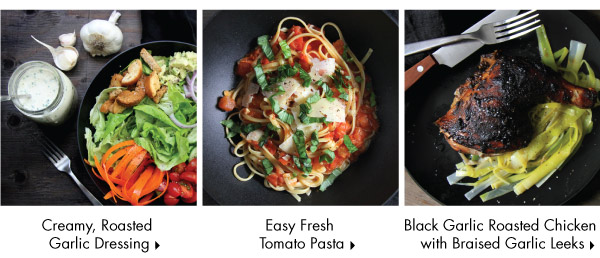
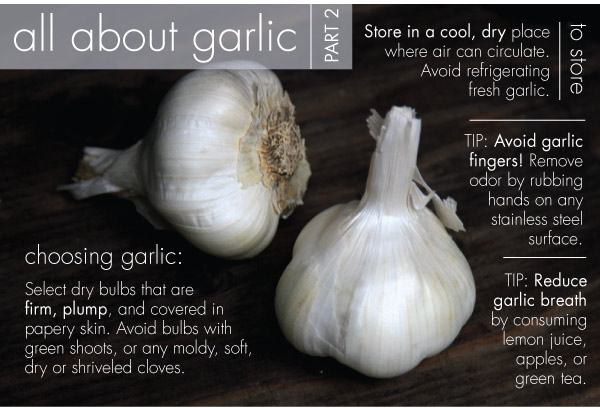
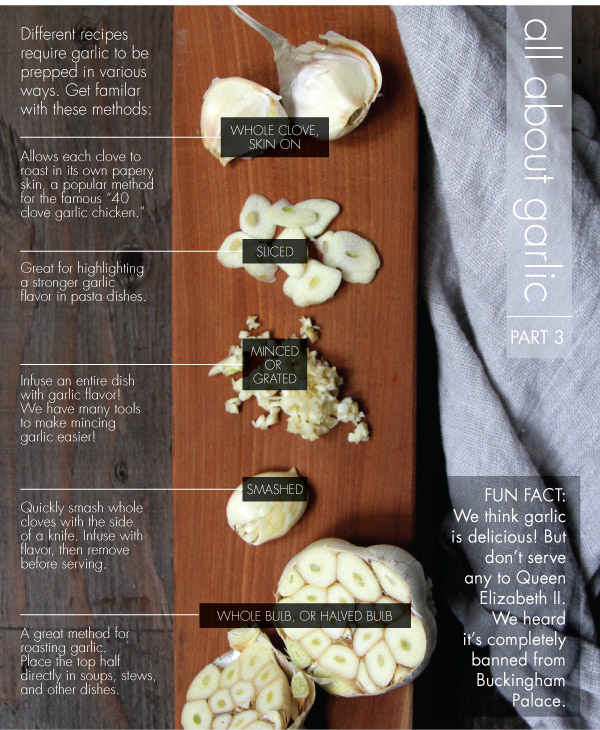
A good cook's secret, garlic stars in cuisines all over the world-it's certainly one of our favorite ingredients! Garlic's distinct flavor turns dull dishes into something tasty and craveable. IN THIS ISSUE, we're getting re-acquainted with garlic, and appreciating it at a whole new level. Roasted garlic transforms a creamy salad dressing, sliced garlic infuses flavor into a quick fresh tomato pasta, and coveted black garlic is featured in a roasted chicken. Start cooking!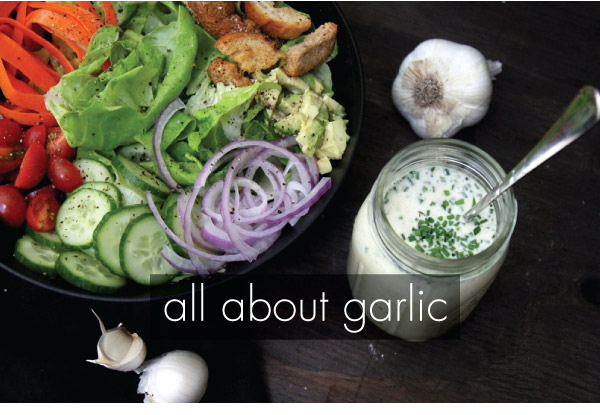

|
A fun to use tool that chops garlic quickly with a simple rolling motion. |
|
Simply the best garlic press. Cloves are pressed completely without needing to be peeled. |
|
Great for shredding garlic into a fine mince. Perfect for zesting and grating hard cheeses too! |
|
Avoid garlic fingers when peeling! Simply insert the cloves and roll to remove the papery layers. |
 A lovely stoneware piece designed to keep garlic at its best! |
|
This compact gadget minces or slices peeled garlic and deposits it neatly in the clear bin. |


February 15, 2018
Serves 4
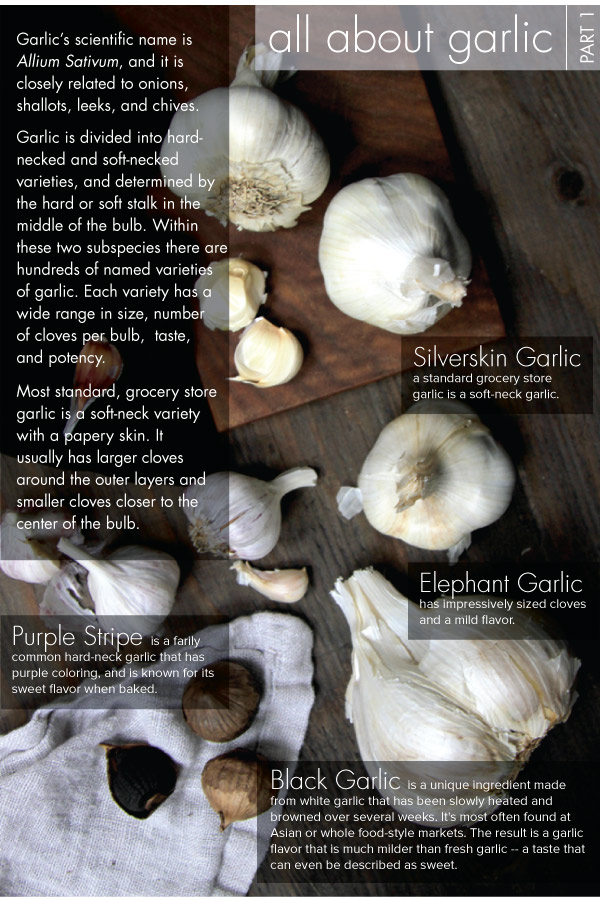
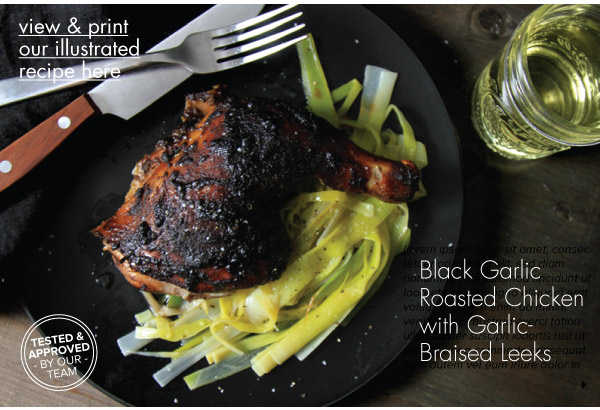
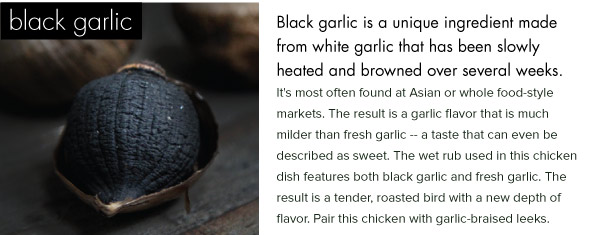
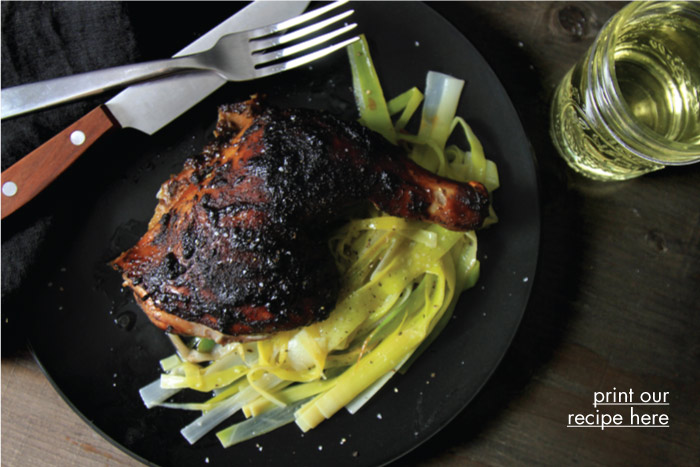
Black garlic is a unique ingredient made from white garlic that has been slowly heated and browned over several weeks. It's most often found at Asian or whole food-style markets. The result is a garlic flavor that is much milder than fresh garlic -- a taste that can even be described as sweet. The wet rub used in this chicken dish features both black garlic and fresh garlic. The result is a tender roasted bird with a new depth of flavor. Pair this chicken with garlic-braised leeks (recipe below).
Ingredients:
1 whole roasting chicken (about 4-5 pounds)
Wet Rub Ingredients:
2 tablespoon vegetable oil
3 cloves garlic
3 cloves black garlic
1 tablespoon fresh ginger, minced
3 tablespoons soy sauce
1 teaspoon sesame oil
1 tablespoon honey
1 tablespoon hoisin sauce
1 jalapeno, seeded
Directions:
1. Preheat the oven to 425 degrees F.
2. Spatchcock the whole chicken as follows: With the breast side down, cut on either side of the backbone from tail to neck, and pry apart. Cut the top of the breastbone and loosen the muscles on either side of the breastbone cartilage. Remove the breastbone, (keel bone), and further flatten the chicken open by pressing down. Spatchcocking the chicken flattens the chicken allowing it to roast more evenly and quickly.
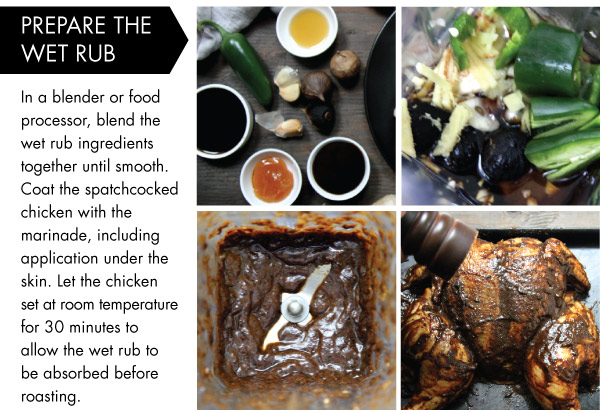
3. In a blender or food processor, blend the wet rub ingredients together until smooth.
4. Coat the spatchcocked chicken with the marinade, including application under the skin. Let the chicken set at room temperature for 30 minutes to allow the wet rub to be absorbed.
5. Place the chicken on a sheet pan, and roast for 40-45 minutes, or until the internal temperature reaches 165 degrees F at the thickest part of the breast.
6. Cut or carve the chicken into pieces to serve.
February 15, 2018
Serves 2-3
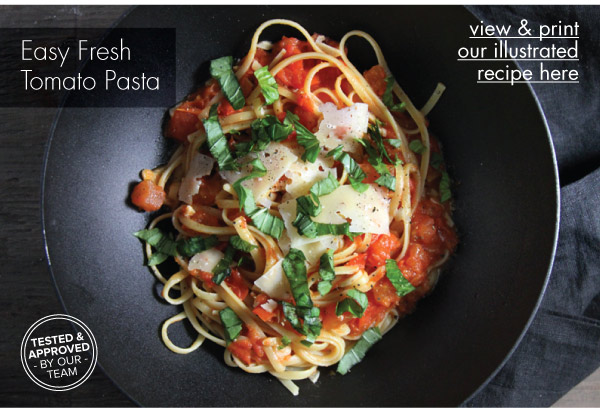
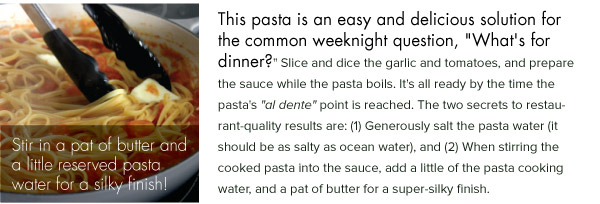
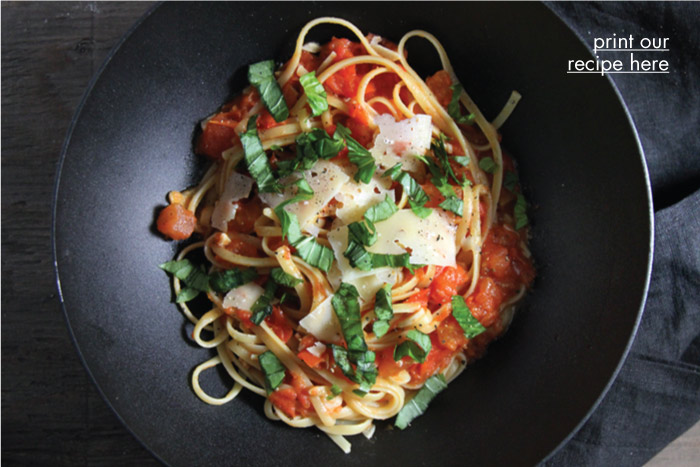
This pasta is an easy and delicious solution for the common weeknight question, "What's for dinner?" Slice and dice the garlic and tomatoes, and prepare the sauce while pasta boils. It's all ready by the time the pasta's "al dente" point is reached. The two secrets to restaurant-quality results are: (1) Generously salt the pasta water (it should be as salty as ocean water), and (2) When stirring the cooked pasta into the sauce, add a little of the pasta cooking water, and a pat of butter for a super-silky finish.
Ingredients:
1/2 lb linguine, cooked according to package instructions
3 tablespoons olive oil, divided
3 tablespoons butter, divided
6 cloves garlic, thinly sliced
Kosher salt, to taste
Fresh ground pepper
2 lbs. ripe Roma tomatoes, diced
Shaved parmesan, for garnishing
Fresh basil, for garnishing
Directions:
1. Sauté the sliced garlic in 2 tablespoons of olive oil and 2 tablespoons of butter in a large sauté pan over medium heat for about 30 seconds. (Do not allow the garlic to brown.)
2. When the garlic turns fragrant, add the Roma tomatoes.
3. Simmer the tomatoes and garlic until any released liquid reduces and the sauce concentrates and thickens slightly (about 15 minutes).
4. Meanwhile, in a large pasta pot, boil the pasta until cooked to the just tender, al dente stage. Reserve 1 cup of the pasta cooking water.
5. Add the cooked pasta directly to the sauce using tongs to transfer from the boiling water to the sauce pan. Add up to 1 cup of reserved pasta water, as needed, so that the sauce easily coats the pasta. For a silky, “restaurant-style” texture, stir in the final tablespoon of butter. Mix all together with tongs until nicely combined.
6. Serve the pasta with generous shavings of Parmesan cheese and a garnish of fresh basil.
February 15, 2018
Makes almost 2 cups of dressing
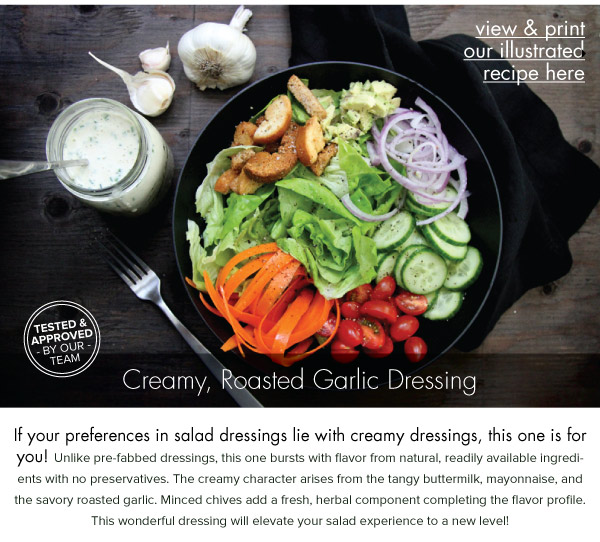
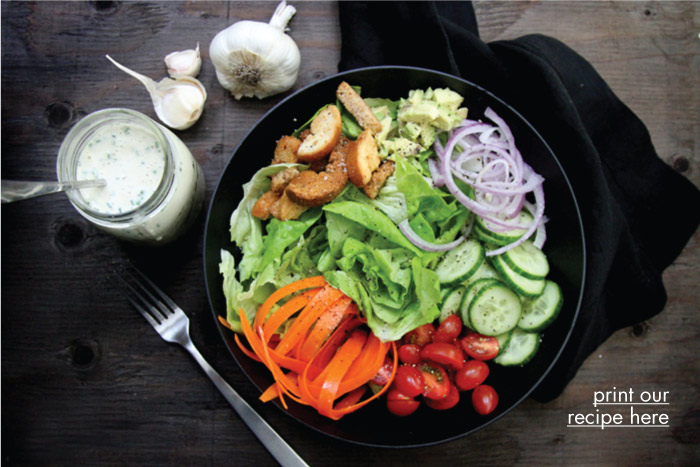
If your preferences in salad dressings lie with creamy dressings, this one is for you! Unlike pre-fabbed dressings, this one bursts with flavor from natural, readily available ingredients, and no preservatives. The creamy character arises from the tangy buttermilk, mayonnaise, and the savory roasted garlic. Minced chives add a fresh, herbal component completing the flavor profile. This wonderful dressing will elevate your salad experience to a new level!
Dressing Ingredients:
2 heads of garlic, roasted (see below)
2 tablespoons olive oil
1/2 cup mayonnaise
1 cup buttermilk
1 teaspoon fresh cracked pepper
Kosher salt, to taste
2 tablespoons minced, fresh chives
Directions:
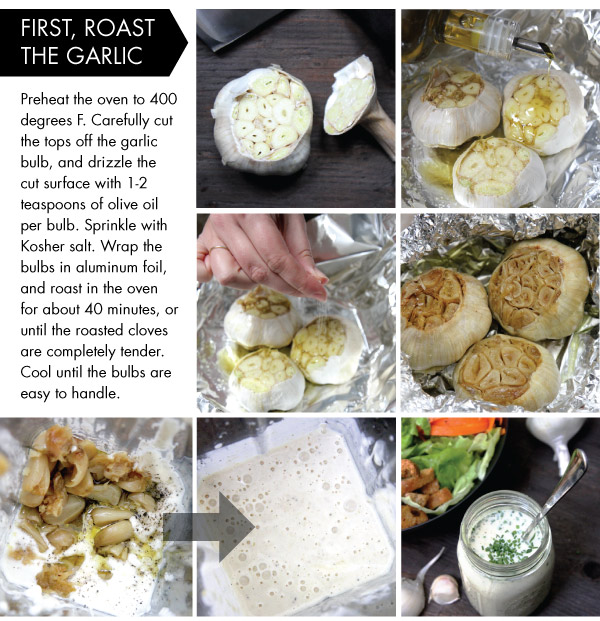
1. Preheat the oven to 400 degrees F. Carefully cut the tops off the garlic bulb, and then drizzle the cut surface with 1-2 teaspoons of olive oil per bulb. Sprinkle with Kosher salt. Wrap the bulbs in aluminum foil, and roast in the oven for about 40 minutes, or until the roasted cloves are completely tender. Cool until the bulbs are easy to handle.
2. Remove the roasted garlic cloves from the bulb. The tender cloves should easily be ejected from the papery layers with a little thumb and finger squeeze. Blend the roasted garlic cloves with the remaining dressing ingredients, (except the chives). Blend until smooth in a blender or handheld immersion blender. Chill well before serving. Use the dressing within one week. Add the minced chives to the dressing just before serving.
3. Generously drizzle the dressing on a fresh salad. Try a salad of butter lettuce, shaved carrots, grape tomatoes halves, red onion slices, cucumber slices, avocado, and croutons.
February 02, 2018
Serves 2-4
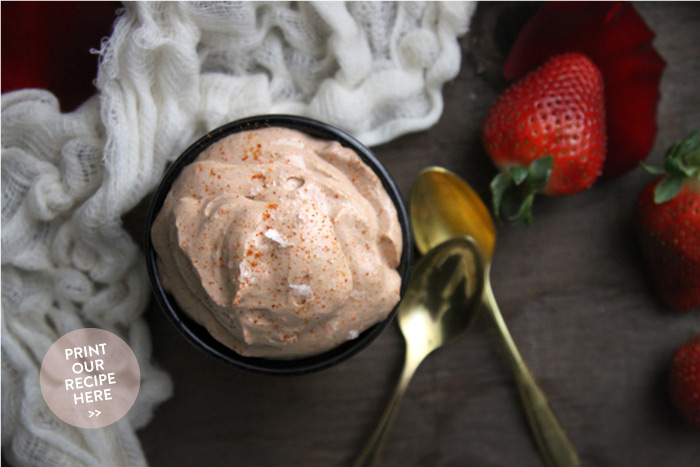
Chocolate mousse has a fancy reputation, but is actually deceivingly easy to make! This recipe, in particular, comes together in no time with light and airy results characteristic of any successful mousse. Keep things hot this Valentine's Day by adding just a little cayenne kick-- it creates the slightest of spicy sensation that naturally pairs nicely with chocolate! We recommend preparing this sweet ending the day before to allow plenty of relaxation on the day of your date night.
Ingredients:
1 egg
2 tablespoons sugar
1-1/4 cup cold heavy whipping cream, divided
3 oz semi-sweet chocolate chips (roughly 1/2 cup)
1/8 teaspoon cayenne pepper
Directions:
1. In a stand mixer, beat the egg and granulated sugar until fully incorporated.
2. Meanwhile, in a small saucepan over medium heat, warm 1/2 cup heavy whipping cream until hot, about 170 degrees F. Be careful to NOT boil the whipping cream. Pour the hot cream into the egg mixture slowly in a thin stream on low speed, (or continually whisking) until combined. (A slow stream and continually movement will help keep the mixture from curdling.)
3. Add the combined egg and cream mixture back into the saucepan and over low heat, stir constantly until thickened. Take care to NOT boil the mixture.
4. Remove the mixture from the heat, and stir in the chocolate chips until they are fully melted. Fold in the cayenne pepper. Cover and refrigerate the mixture for 2 hours, or until fully chilled, stirring occasionally.
5. When the chocolate mousee base is completely chilled, whip the remaining heavy cream in a cold mixing bowl until stiff peaks begin to form. Next, fold the stiff whipped cream into the mousse base until fully incorporated and smooth.
6. Distribute the mousse into small ramekins or dessert dishes. Cover and chill until ready to serve. Dust with additional cayenne and flake salt, if desired.
